|
|
Create/Update Booking > Create/Copy a Booking |


Create/Copy a Booking
In PCC.NET, you can create Booking in two ways, and also copy an existing Booking:
1. Create Booking from Contract (User-Created Booking)
To create a Booking from Contract, you must have the Create Booking role and the Create Booking From Contract system action..
You can create a Booking only from the latest version of a Contract that is in Complete status. This applies to both Space Checking or Customer-Requested Bookings.
To create Booking from Contract:
- Click Operational > Booking > Booking Creation From Contract to open the Create Booking From Contract (OPCNW02) screen.
- Search for Contracts by selecting the required parameters in the Contract Search panel. The status is selected as Complete by default.
- Click the Contract No. hyperlink in the Contract Details panel to open the Contract in the View Contract (OPCNW03) screen.
- In the Contract panel (top-left corner of the screen), click any one LP-DP combination and select single or multiple Make/Models under that LP-DP combination by clicking the corresponding check boxes.
Notes:
- If any Load Port (LP)/Discharge Port (DP) pair of a Contract has been deleted, you cannot create a Booking against it. The deleted port pair does not appear in the Contract Details panel.
- Model and Revenue information appears only for a single selection of a Make and Model. If you select multiple Make/Models check boxes on the left pane, the Model and Revenue Details information on the right pane disappears. The Model Details header changes to Model Details (only selected models will be used to create booking) and Revenue Details header changes to Revenue Details (Revenues with selected models will be used to create booking).
- Click CREATE BOOKING. A dialog box Add Revenue for Selected Cargo appears with selected Make-Model(s) and associated revenue details from the Contract.
- Enter number of units (No of Unit) for each cargo and its UM in the Cargo panel of the dialog box. The cargo count mentioned in this dialog box is internally calculated and displayed in the Create/Update Booking (OPBKW02) screen, which you can modify later.
- Select all or particular revenue details of each Make-Model and click CONFIRM. On confirmation, you are navigated to the Create/Update Booking (OPBKW01) screen with the details (such as Customer, Port Pair, Freight, Commodity) populated from the latest version of the selected Contract.
Notes:
- CREATE BOOKING is enabled only for the latest revision of a complete Contract in the View Contract (OPCNW03) screen.
- While creating a Booking, PCC.NET checks the Applicable Charges (at least one), available in the Contract, calculates, and then populates the amount in the Booking for a given port-pair combination. The calculation is done based on the Rated At value of the corresponding Charge as the sum of a percentage of the Applicable Charges associated with it.
- If FMC information is available in Contract having Origin/Destination in US territory, the informationinformation is populated in the corresponding Booking from the Contract. You can later change the FMC Filing type and FMC Number in Booking.
-
FMC information retrieved during creating a Booking from Contract
While creating a Booking, if FMC information is already entered in the corresponding Contract (having Origin/Destination in the US territory), that information gets automatically populated in the FMC Details dialog box of the corresponding Booking.
-
If the FMC information is entered at Port-pair level of a Contract, the information gets populated in the FMC References pane of the FMC Details dialog box.
-
If the FMC information is entered at Make Model level of a Contract, the Exempt FMC check box gets selected in the Cargo Details panel of the FMC Details dialog box.
-
If the FMC information is entered at Revenue level of a Contract, the information gets populated in the FMC Filing Against Revenue panel of the FMC Details dialog box.
Notes:
-
If the FMC information entered in a Contract is an expired one, while creating a Booking from the Contract, PCC.NET displays an warning message ("600036-CON-Contract contains expired FMC information. Do you want to proceed with expired FMC?") asking user whether to apply expired FMC information in the Booking. You need to confirm in the message to apply the FMC details in that Booking.
-
During Booking creation PCC.NET checks if Space Charter Agreement Number entered in the Contract is not deleted from the FMC Document Details (OPBKW07) screen. If that Space Charter Agreement Number is deleted from FMC Document Details (OPBKW07) screen, PCC.NET ignores the Space Charter Agreement Number and creates the Booking without any FMC information.
-
While updating the FMC information in a Booking, if the FMC information is already entered in the Revenue level, and you try to select the Exempt FMC check box, PCC.NET displays an warning message,"There are already FMC Filing information entered with associated revenue. Do you want to remove them?". You need to confirm the deletion in the message.
-
While updating the FMC information in a Booking, if you clear the Exempt FMC check box and add FMC information against only one Revenue, while saving, PCC.NET displays an error message "300062-BKG-Required FMC filing details for cargo seq.1 and Revenue seq. 2".
-
-
- If the FMC information entered in a Contract has expired, PCC.NET displays a warning message asking whether you wish to apply expired FMC information in the Booking. If you confirm, PCC.NET proceeds to create the Booking and sets the expired FMC details in FMC Filing dialog box. On selecting No in the message, PCC.NET creates the Booking without retrieving any FMC information from the Contract.
- In the Create/Update Booking (OPBKW01) screen, if you want to create the Booking for space checking, select Yes from the For Space Checking drop-down list in the Header. Else, for Customer-Requested Booking, keep the value as No.
- Provide all the required information to create the Booking:
- To create a Booking quickly with the mandatory information, click herehere.
Information of the Contract is automatically populated in this screen. However, you can modify the information. Complete the instructions given below to edit the information in the respective panels of this screen.
-
General Details panelGeneral Details panel
Modify the information in the Booking Date, Booking Office, Doc Entry Office, and Doc Issuing Office fields.
Draft is selected by default as the status in the Status drop-down list. You need to save a Booking with Draft status first time.
Select Yes from the For Space Checking drop-down list if the Booking request is for space checking.
Notes:
-
Click here for field descriptions of the General Details panel.
-
Contract No. is Read-only and auto-populated from the corresponding Contract as you are registering the Booking directly. You may change the Contract number while switching between Broker and Broker customer.
-
Documentation Entry Office and Documentation Issuing Office are required during Booking acceptance.
-
-
Select customer in the Initiator, Shipper, Forwarder, and Consignee tabs. By default Shipper details are populated from the Contract, which you can update. At least, one of the Booking customers (Initiator/Shipper/Forwarder) should be either the Main Customer or the Affiliated Customer in the associated Contract.
Select the Initiator check box in the Shipper, Forwarder, and Consignee tabs to mark the customer as Initiator.
Notes:
- Click here for field descriptions of the Customer Details panel.
- At least, Initiator or Shipper is required to save a Booking as Requested or Accepted.
- Click here for field descriptions of the Customer Details panel.
-
Adding a route leg is optional in Draft Status.
Select the Departure On/After date. It is set as current date by default which you can update.
Click ADD LEG to create the first leg of the route. A new itinerary row is inserted.
Click the row and the To Location field to update it, and similarly other details in the row.
Notes:
-
Click here to refer the field descriptions of the Route Details panel.
-
To delete a leg, click
 adjacent to the leg. You can delete
only the last leg.
adjacent to the leg. You can delete
only the last leg.
-
While updating a Booking, you can add a leg after the last leg, and not between the existing legs.
-
From Location (LP), To Location (DP), C/O at both the locations, and Voyage Name are required for all Bookings.
-
During Booking creation for PCL and LINE, Route Status is defaulted as Not Approved. Based on the approval from LINE(s) & PCL Leg Mass Approval (OPBKW04) screen, PCC.NET changes the route status to either Approved or Rejected.
-
During Booking creation for FEEDER, Route Status displays Not Approved. If corresponding approval flag in Feeder Service (OPBKW28) screen is on, PCC.NET automatically marks the status as Approved. Else, based on the approval from Feeder Mass Leg Approval/Arrangement (OPBKW05) screen, PCC.NET changes the route status to either Approved, Arranged, or Rejected.
-
Click here to know more about the common restrictions and validations of the different transport categories.
-
-
You cannot edit HS Code field. Also, the Cargo Type, Make and Model fields cannot be edited for non-generic Models.
Click
 in the Cargo panel to open the Edit Cargo dialog box and edit the corresponding
record.
in the Cargo panel to open the Edit Cargo dialog box and edit the corresponding
record.
Enter the Make/Model and Number of Units.
Click CARGO DETAILS to enter L-W-H pattern details for each cargo. The Cargo Details dialog box appears.
Add or modify the L-W-H pattern Cargo details entry against each cargo.
Click OK.
Notes:
-
Ensure that the sum of Units of all Models present in this dialog box equals the No. of Units entered in the Edit Cargo dialog box.
-
Cargo type, HS Code, Make, Model, Units, Length, Width, Height, Total Weight, Freight Weight, Freight Measure (CBM), and Total Measure are required.
Alternatively, click ADD CARGO FROM CONTRACT to select a different set of Cargo for the current Contract. The Cargo From Contract dialog box appears.
Click OK in the dialog box to fetch all the cargoes from the Contract to the Booking. You cannot deselect any cargo in the Cargo From Contract dialog box. But you can delete a cargo from the Cargo panel after it is populated in the Booking. At least one cargo item must be present in the Booking.
Click VIN ASSOCIATION to open the Associate VIN dialog box to associate Vehicle Identification Number (VIN) with the Booking.
Click here for field descriptions of the Cargo Details panel.
-
-
For Space Checking Booking does not require Revenue information.
Only Freight Collection Office, Invoicing Office and Payer fields are editable in the Booking when a charge is retrieved from Contract and the charge basis does not fall among PT or RT.
Click REFRESH RATE FROM CONTRACT to open the Refresh Rate from Contract dialog box to select refreshed rates from the Contract, along with all the cargoes used for the current Booking for the concerned Load port and Discharge Port.
Click OK in the dialog box to update all the rates in the Booking Revenue.
Click ADD REVENUE to add new blank row and add Supplementary charges to the Booking. Click
 to save the entry.
Click
to delete duplicate charges with same charge codes if retrieved from the Contract.Notes:
-
Click here to refer the field descriptions of the Revenue Details panel.
-
For the charges with basis as PT, you need to select Applicable charges (at least one) for calculating the Rated At value for the corresponding charge.
-
To edit a record, as you click
, the corresponding row becomes editable and  toggles to , which allows you to save the updated record.
  allows you come out of the Edit mode.
-
-
Remarks & Term panelRemarks & Term panel
Enter remarks, if any, in the Booking Remarks field, and Freight-related remarks, in the Freight Remarks field. PCC.Net shows the cargo terms from Contract in the Term drop down list.
Select the BL As Arranged check box to indicate that the B/L contains Freight.
Enter Customs Clearance Number if the From Location (LP) is in Australia or New Zealand.
Click here for field descriptions of the Remarks panel.
Refer to the validations in the following panels before you create the Booking.
- RouteRoute
-
Adding a route leg is optional in Draft Status.
-
Before creating the route, you need to select the Departure On/After date. Later on, this date is used for selecting the ATD (when available) or ETD of the first Booking route. For the Leg beyond the second line, schedules with ATD or ETD later than the ATA or ETA of the Discharging Port of the last Leg needs to be derived.
-
You can create route from three different types of transport Category in PCC.NET: Line, Feeder and PCL. Based on the Category you select, the fields in this panel varies. Click here to know about the common restrictions and validations of the different transport categories.
-
Each route must have at least one Line leg.
-
For PCL and Feeder legs, you can add cost information optionally.
-
You can add legs only at the end of the Route (after the last leg).
-
Load and Discharge port should be valid locations.
-
ATA/ETA value for the Arrives on Port should be later than the ATD/ETD of the Departs On port.
-
Load and Discharge ports should not be deleted with respect to the selected voyage.
-
-
In case, the From Location (LP) selected in the route is deleted for a Voyage, the Loading Port Name, C/O and ATD/ETD will appear in red font and as strike-through. Similarly, if To Location (DP) present in the route is deleted for a Voyage, PCC.NET displays Discharging Port Name, C/O and ATA/ETA in red font and strike-through.
-
During saving the Booking, if a port present in the Booking route is deleted for a Voyage, PCC.NET displays an error message asking you to change the Route.
-
To create Booking and update Booking, after a port has got Doc Locked for a Voyage, you need Privileged Booking User Role and Booking Creation for Supplementary B/L system action.
-
When the Booking legs are approved (and arranged for Feeder leg) and all mandatory information is entered, the Booking Status automatically changes to Accepted.
-
To let you easily distinguish Booking leg’s estimated date/time from the actual date/time, the ETD/ETA and ATD/ATA values are shown in different colors. ATD and ATA is shown in blue, whereas ETD and ETA in black.
Validations for LINE:
-
Route can be created with both intended and firmed voyages.
-
Each route must have at least one Line leg.
-
You cannot keep Voyage name blank. It must be either an intended or a firmed voyage.
-
Only voyages with data entry status Complete are used for Booking route creation.
-
While searching the connecting vessels, PCC.NET considers and display the ATA or ATD first if it is present, else, shows ETA or ETD.
-
If you add a transshipment leg, PCC.NET automatically selects the Transshipment check box in the Booking Header section.
Validations for PCL:
-
PCL can be the first leg.
-
PCL leg can be present after a feeder leg (Burge/Truck) or before LINE leg.
-
If voyage schedule is available beforehand, you can enter voyage for PCL otherwise you can leave Voyage blank. You can only enter the DP, approximate ETD/ETA and select Category as PCL.
-
While searching the connecting vessels, PCC.NET considers and display the ATA or ATD first if it is present, else, shows ETA or ETD.
Validations for Feeder:
-
Feeder can be the first leg or after any other leg (PCL or LINE). In addition, Feeder leg can be between LINES.
-
Multiple feeder service based on multiple service providers for same LP-DP can exist. Priority setting in Feeder Service (OPBKW09) is mandatory. During Booking creation, PCC.NET selects the feeder service with higher priority.
-
- CargoCargo
-
When you create a Booking from Contract, PCC.NET automatically populates the cargo details from it in this panel. For non-Generic Models, you can edit these cargo details by clicking
except the Cargo Type, Make and Model and some conditional fields. But, for Generic Models, PCC.NET allows to update all details in cargo (except Seq.) for all types of Contract. But Rate in the Revenue should be kept same as the initial rate for the Generic Model based on following logiclogic.-
If the newly-selected Model does not exist in the same Contract number -> LP/DP, PCC.NET does not change the Rate for that the Generic Model.
-
If the newly-selected Model exists in the same Contract number -> LP/DP, Rate automatically gets changed from the Generic Model rate to rate as per the newly-selected model.
-
-
You must add the Units (of PCC cargo) and UM to save the Booking.
-
For each cargo, at least one default L-W-H pattern cargo details is automatically retrieved from the corresponding cargo of Model Code (not Model Description), Length, Width, Height, Unit Weight, No. of Units, Total Weight and Total Measure (CBM). You can add or modify the L-W-H pattern Cargo details entry against each cargo. PCC.NET checks if at least one L-W-H pattern cargo details entry against each Make/Model irrespective of it’s type (Actual/Generic) is present.
-
You can delete any cargo but at least one cargo item must be present. On deletion of a cargo, corresponding L-W-H pattern all cargo detail entries also get deleted automatically.
-
The sum of Units of all Models present in Cargo Details dialog box must equal the No of Units entered in the Edit Cargo dialog box.
-
If Cargo Units are updated in Booking, the Booking status remains unchanged irrespective of its status.
-
The HS Code, Length, Width, Height, Bump to Bump, Mirr to Mirr, UM, and Cargo Hand fields are Auto-populated from the Model Master (RFMKW02) screen based on the corresponding Model code.
-
You can associate different VINs (Vehicle Identification Number) with the current Booking, provided those are not already associated with any other live Booking/shipment. If VINs are added to multiple B/Ls created from a Single Booking, then those VINs are also added to the associated Booking automatically. If any VIN is deleted from B/L, the particular VIN associated with the corresponding Booking also gets deleted automatically.
-
You can add cargo to the Booking from the associated Contract using ADD CARGO FROM CONTRACT, which fetches the cargo from the Contract. By default, already added cargo in the current Booking is shown auto-selected in the Cargo From Contract dialog box, which you cannot deselect. But you can add cargoes to Booking that are present in the corresponding Contract under the current Port pair.
-
While adding new cargo from Contract, it is mandatory to enter the No of Units along with its UM against each cargo to be newly added to the Booking.
-
If any Load Port (LP)/Discharge Port (DP) pair of a Contract has been deleted, during Add Cargo from Contract action, PCC.NET retrieves the Cargoes not present in the Booking, including FMC information (if present), ignoring the deletion of the associated LP/DP pair.
-
In case ETD of the first Load Port is available in the Booking and any of the FMC in Contract Revenue is expired with respect to the ETD of the first Load Port, a warning message “FMC document in contract is expired. Do you want to bring FMC information from Contract to Booking?”, on your acceptance the cargo is added from the Contract and those expired FMCs are set in Booking Revenue. Otherwise the cargo gets added without setting those FMCs in Booking Revenue.
-
- RevenueRevenue
-
When you create a Booking from Contract, all revenue charges for a particular Port pair and selected Make/Model are retrieved in the Booking from the latest revision of the Contract. A privileged Booking user is able to add Supplementary charges and update some existing revenue information in Booking. Only Freight Collection Office, Invoicing Office and Payer fields are editable in the Booking when a charge is retrieved from Contract and the charge basis does not fall among PT or RT. Other charges from Contract cannot be changed in Booking.
-
For the charges with basis as PT and having dependent charges against that PT basis charge saved in Contract, while creating a Booking, PCC.NET checks if at least one Applicable Charge is available in the Contract, calculates, and populates the amount in the Booking for a given port-pair combination.
-
For the changes with basis as RT, you can change the value of cargo UM to RT when you want to put Rated At value as per your desired value, otherwise Rated At value gets automatically calculated, hence is disabled.
-
-
For EDI Bookings, the Revenue Details panel initially appears blank. You need to select the Contract Number to retrieve the latest rates from the Contract for all the Makes and Models in the Booking.
-
In Booking, you can add only additional Supplementary charges, provided those are not present under the latest version of the Contract.
-
If you have deleted a Supplementary charge in the Booking that is present in the associated Contract and then try to add it again to the Booking, PCC.NET restricts to add that Supplementary charge. You must click REFRESH RATE FROM CONTRACT and add the required Supplementary charge.
-
To modify any rate of Contractual charge, you need to update the Contract first and apply the new rates using REFRESH RATE FROM CONTRACT. You may need to refresh the rate after re-selecting Contract number while switching between Broker and Broker customer.
-
While performing a Refresh Rate from Contract, when expired charge(s) are present against the ATD (if available)/ETD at the first Load Port for a particular Vessel/Voyage, PCC.NET automatically dis-associates the charge from the associated Booking Revenue. You are not required to remove the expired charge(s) additionally. When the ATD (if available)/ETD at the first Load Port is not between the Effective From and Effective To dates of the Contract, the Revenue charge(s) are considered as expired.
-
If any Load Port (LP)/Discharge Port (DP) pair of a Contract has been deleted, during Refresh Rate from Contract action, when Booking is not rolled over or first LP/last DP did not change, PCC.NET ignores the deletion of LP/DP pair and retrieves the new charges from the Contract that are missing in the Booking, the latest rates of the existing revenues in Booking, and FMC information, if present. But after Booking Rollover, PCC.NET restricts you to refresh the rate if the first LP or last DP of the Booking has changed and the current port pair of the Booking is already deleted from the associated Contract. In such a case, it displays an error message stating that the current port pair is not present in the Contract; you must add the port pair in the Contract.
-
If overlapping rates are populated from Contract, you should delete the duplicate charges with same charge codes.
-
PCC.NET verifies if the charge/rate is same as per Make and Model of the corresponding latest revision of the Contract. If there is any mismatch, it restricts you from saving the PCC Booking.
-
When you change the Payment Term (P/C) value or Freight Collection Office value in Booking, PCC.NET tries to find a unique Rate based on the Charge, Basis, Payment Term and Freight Collection Office, and automatically set it.
-
At least one revenue (OFR) must be there for each Make and Model in Booking.
-
You can add a charge multiple times with different rates for a cargo. Also, you may add a supplementary charge multiple times with different rates when you add it in Booking without associating it with any Make/Model.
-
If a Booking contains multiple OFR charges, they must all be in same currency values.
-
Rate can be zero for both Contractual and Supplementary changes, that is amount can be zero for any charges.
-
Booking Payer must be active in PCC.NET.
-
At the time of saving the Booking, PCC.NET checks the Contract charges in the Booking. If all Contract revenues (except, OFR) for one charge code against a Cargo are removed in the Booking Revenue, a warning message appears asking your confirmation whether you want to proceed without those revenues. On confirmation, PCC.NET proceeds to save the Booking, otherwise not.
-
During saving the Booking, PCC.NET also checks if the currency in the Booking Revenue has been deleted and if the date of currency becoming obsolete is later than the system date. If this validation fails at any Booking status, you cannot save the Booking.
-
-
FMC information retrieved during creating a Booking from Contract
While creating a Booking, if FMC information is already entered in the corresponding Contract (having Origin/Destination in the US territory), that information gets automatically populated in the FMC Details dialog box of the corresponding Booking.
-
If the FMC information is entered at Port-pair level of a Contract, the information gets populated in the FMC References pane of the FMC Details dialog box.
-
If the FMC information is entered at Make Model level of a Contract, the Exempt FMC check box gets selected in the Cargo Details panel of the FMC Details dialog box.
-
If the FMC information is entered at Revenue level of a Contract, the information gets populated in the FMC Filing Against Revenue panel of the FMC Details dialog box.
Notes:
-
If the FMC information entered in a Contract is an expired one, while creating a Booking from the Contract, PCC.NET displays an warning message ("600036-CON-Contract contains expired FMC information. Do you want to proceed with expired FMC?") asking user whether to apply expired FMC information in the Booking. You need to confirm in the message to apply the FMC details in that Booking.
-
During Booking creation PCC.NET checks if Space Charter Agreement Number entered in the Contract is not deleted from the FMC Document Details (OPBKW07) screen. If that Space Charter Agreement Number is deleted from FMC Document Details (OPBKW07) screen, PCC.NET ignores the Space Charter Agreement Number and creates the Booking without any FMC information.
-
While updating the FMC information in a Booking, if the FMC information is already entered in the Revenue level, and you try to select the Exempt FMC check box, PCC.NET displays an warning message,"There are already FMC Filing information entered with associated revenue. Do you want to remove them?". You need to confirm the deletion in the message.
-
While updating the FMC information in a Booking, if you clear the Exempt FMC check box and add FMC information against only one Revenue, while saving, PCC.NET displays an error message "300062-BKG-Required FMC filing details for cargo seq.1 and Revenue seq. 2".
FMC information retrieved during Refresh Rate from Contract after Rollover
-
If Rollover does not change First LP or Last DP, there is no impact on FMC details retrieved during Refresh Rate from Contract.
-
After Rollover from a non-US port to an US port, FMC details are retrieved and selected from Contract by checking the availability of FMC details hierarchically (that is, first Booking level, then Cargo level, and lastly Revenue level in the FMC Details dialog box).
-
After Rollover from an US port to another US port, existing FMC details are deleted first and the new details retrieved from Contract are applied by checking the availability of FMC details hierarchically.
FMC information retrieved during Refresh Rate from Contract (without Rollover)
-
If the Contract has FMC information at the Revenue level, during the Refresh Rate from Contract process, the same is selected against that Booking Revenue.
-
If Booking has Space Charter Agreement number in the FMC Reference pane of the FMC Details dialog box, Contract-specific FMC information is ignored.
FMC information retrieved during adding Cargo from Contract
-
If the Contract has FMC information at the port-pair level, FMC information present for the newly-added cargos in the Contract does not get displayed in the Booking.
-
If the Contract has FMC information at the Cargo or Revenue level, FMC information gets retrieved in the Booking.
Notes:
- During Add Cargo from Booking, PCC.NET checks if Space Charter Agreement Number is available in the FMC Reference pane of the FMC Details dialog box. If any Space Charter Agreement Number is entered in the Booking, FMC information does not get retrieved in the Booking.
- During Add Cargo from Contract, PCC.NET checks if Space Charter Agreement Number entered in the Contract is active in the FMC Document Details (OPBKW07) screen. If that Space Charter Agreement Number is deleted from FMC Document Details (OPBKW07) screen, PCC.NET ignores Space Charter Agreement Number.
- If the FMC information is an expired one with respect to the ETD of the first load port, PCC.NET displays warning message.
-
-
- For descriptions of all field in the Create/Update Booking (OPBKW02) screen, click here.
- Know the important validationsvalidations before you create the Booking.
-
-
By default, Main Customer of Contract is populated as Shipper. You can also add additional Customer details to Booking.
-
At least, one of the Booking customers (Initiator/Shipper/Forwarder) should be either the Main Customer or the Affiliated Customer in the associated Contract. However, this is not valid when you create a Booking from a Spot Rate Guideline Contract; you can select any customer (even dummy) as the Booking customer using the Auto-complete feature. If the Booking is being created from SRG Contract ‘Dummy Customer’ information is displayed as Shipper, which needs to be changed in the Booking.
-
Cross Reference Customer is not allowed during new Booking creation. If the Booking is already created with any Customer and later on that Customer is marked as Cross Reference, PCC.NET allows to save that Booking as it is already saved with that Customer. You cannot even update a Booking with a Cross Reference Customer if it has been earlier created with a non-Cross Reference Customer.
-
You can select any of Shipper, Forwarder, or Consignee as Initiator by selecting the respective check box.
-
PCC.NET does not accept a Booking with dummy Customer. Booking created from Spot Rate Guideline may have a dummy Customer. Booking can be in Draft or Requested status with Dummy Customer. But a valid customer is needed for a Booking to be Accepted.
-
At least, Initiator or Shipper is required to save a Booking as Requested or Accepted.
-
After you select a Customer, PCC.NET populates the remaining information from the Customer (RFCSW01) screen, which you can modify in the Booking.
-
Customer must be a valid customer (not deleted and not having cross reference number assigned against it) registered in Customer (RFCSW01) screen in PCC.NET.
-
In Initiator, Shipper, Forwarder, and Consignee tabs, you can select any Customer either from the list of values of Customer, or the Booking Customer dialog box which is displayed by clicking
 with the list of all affiliated customers. When you change the Initiator, Shipper, Forwarder, or Consignee from the Name LOV, a Warning pop-up appears to confirm the action.
 -
For EDI Bookings, while editing the Customer information, Dummy Customer (9999997) is shown for Initiator, Shipper, Consignee, Forwarder, and Payer. For Non-SRG Contracts, Dummy Customer (9999999) is populated from the corresponding Contract but it cannot be saved.
-
-
-
Adding a route leg is optional in Draft Status.
-
Before creating the route, you need to select the Departure On/After date. Later on, this date is used for selecting the ATD (when available) or ETD of the first Booking route. For the Leg beyond the second line, schedules with ATD or ETD later than the ATA or ETA of the Discharging Port of the last Leg needs to be derived.
-
You can create route from three different types of transport Category in PCC.NET: Line, Feeder and PCL. Based on the Category you select, the fields in this panel varies. Click here to know about the common restrictions and validations of the different transport categories.
-
Each route must have at least one Line leg.
-
For PCL and Feeder legs, you can add cost information optionally.
-
You can add legs only at the end of the Route (after the last leg).
-
Load and Discharge port should be valid locations.
-
ATA/ETA value for the Arrives on Port should be later than the ATD/ETD of the Departs On port.
-
Load and Discharge ports should not be deleted with respect to the selected voyage.
-
-
In case, the From Location (LP) selected in the route is deleted for a Voyage, the Loading Port Name, C/O and ATD/ETD will appear in red font and as strike-through. Similarly, if To Location (DP) present in the route is deleted for a Voyage, PCC.NET displays Discharging Port Name, C/O and ATA/ETA in red font and strike-through.
-
During saving the Booking, if a port present in the Booking route is deleted for a Voyage, PCC.NET displays an error message asking you to change the Route.
-
To create Booking and update Booking, after a port has got Doc Locked for a Voyage, you need Privileged Booking User Role and Booking Creation for Supplementary B/L system action.
-
When the Booking legs are approved (and arranged for Feeder leg) and all mandatory information is entered, the Booking Status automatically changes to Accepted.
-
To let you easily distinguish Booking leg’s estimated date/time from the actual date/time, the ETD/ETA and ATD/ATA values are shown in different colors. ATD and ATA is shown in blue, whereas ETD and ETA in black.
Validations for LINE:
-
Route can be created with both intended and firmed voyages.
-
Each route must have at least one Line leg.
-
You cannot keep Voyage name blank. It must be either an intended or a firmed voyage.
-
Only voyages with data entry status Complete are used for Booking route creation.
-
While searching the connecting vessels, PCC.NET considers and display the ATA or ATD first if it is present, else, shows ETA or ETD.
-
If you add a transshipment leg, PCC.NET automatically selects the Transshipment check box in the Booking Header section.
Validations for PCL:
-
PCL can be the first leg.
-
PCL leg can be present after a feeder leg (Burge/Truck) or before LINE leg.
-
If voyage schedule is available beforehand, you can enter voyage for PCL otherwise you can leave Voyage blank. You can only enter the DP, approximate ETD/ETA and select Category as PCL.
-
While searching the connecting vessels, PCC.NET considers and display the ATA or ATD first if it is present, else, shows ETA or ETD.
Validations for Feeder:
-
Feeder can be the first leg or after any other leg (PCL or LINE). In addition, Feeder leg can be between LINES.
-
Multiple feeder service based on multiple service providers for same LP-DP can exist. Priority setting in Feeder Service (OPBKW09) is mandatory. During Booking creation, PCC.NET selects the feeder service with higher priority.
-
-
-
When you create a Booking from Contract, PCC.NET automatically populates the cargo details from it in this panel. For non-Generic Models, you can edit these cargo details by clicking
except the Cargo Type, Make and Model and some conditional fields. But, for Generic Models, PCC.NET allows to update all details in cargo (except Seq.) for all types of Contract. But Rate in the Revenue should be kept same as the initial rate for the Generic Model based on following logiclogic.-
If the newly-selected Model does not exist in the same Contract number -> LP/DP, PCC.NET does not change the Rate for that the Generic Model.
-
If the newly-selected Model exists in the same Contract number -> LP/DP, Rate automatically gets changed from the Generic Model rate to rate as per the newly-selected model.
-
-
You must add the Units (of PCC cargo) and UM to save the Booking.
-
For each cargo, at least one default L-W-H pattern cargo details is automatically retrieved from the corresponding cargo of Model Code (not Model Description), Length, Width, Height, Unit Weight, No. of Units, Total Weight and Total Measure (CBM). You can add or modify the L-W-H pattern Cargo details entry against each cargo. PCC.NET checks if at least one L-W-H pattern cargo details entry against each Make/Model irrespective of it’s type (Actual/Generic) is present.
-
You can delete any cargo but at least one cargo item must be present. On deletion of a cargo, corresponding L-W-H pattern all cargo detail entries also get deleted automatically.
-
The sum of Units of all Models present in Cargo Details dialog box must equal the No of Units entered in the Edit Cargo dialog box.
-
If Cargo Units are updated in Booking, the Booking status remains unchanged irrespective of its status.
-
The HS Code, Length, Width, Height, Bump to Bump, Mirr to Mirr, UM, and Cargo Hand fields are Auto-populated from the Model Master (RFMKW02) screen based on the corresponding Model code.
-
You can associate different VINs (Vehicle Identification Number) with the current Booking, provided those are not already associated with any other live Booking/shipment. If VINs are added to multiple B/Ls created from a Single Booking, then those VINs are also added to the associated Booking automatically. If any VIN is deleted from B/L, the particular VIN associated with the corresponding Booking also gets deleted automatically.
-
You can add cargo to the Booking from the associated Contract using ADD CARGO FROM CONTRACT, which fetches the cargo from the Contract. By default, already added cargo in the current Booking is shown auto-selected in the Cargo From Contract dialog box, which you cannot deselect. But you can add cargoes to Booking that are present in the corresponding Contract under the current Port pair.
-
While adding new cargo from Contract, it is mandatory to enter the No of Units along with its UM against each cargo to be newly added to the Booking.
-
If any Load Port (LP)/Discharge Port (DP) pair of a Contract has been deleted, during Add Cargo from Contract action, PCC.NET retrieves the Cargoes not present in the Booking, including FMC information (if present), ignoring the deletion of the associated LP/DP pair.
-
In case ETD of the first Load Port is available in the Booking and any of the FMC in Contract Revenue is expired with respect to the ETD of the first Load Port, a warning message “FMC document in contract is expired. Do you want to bring FMC information from Contract to Booking?”, on your acceptance the cargo is added from the Contract and those expired FMCs are set in Booking Revenue. Otherwise the cargo gets added without setting those FMCs in Booking Revenue.
-
Auto-adjustment of Cargo Details for Single Cargo Entry:
-
If you change the Model name in the Edit Cargo dialog box and there is a single entry against a Cargo in the Cargo Details dialog box, PCC.NET auto updates the respective Model Description, Length, Width, Height, Unit Weight and Unit values in the Cargo Details dialog box. Measure and Weight of the cargo details are then calculated based on the updated cargo details entered. However, if there are multiple cargo entries, you have to manually modify the details in the respective panels of the Cargo Details dialog box, as well.
-
If you update any cargo attribute other than the Model name in the Edit Cargo dialog box and there is a single entry against the Cargo details, its Model Description remains unchanged in the Cargo Details dialog box. However:
- For a Generic model, PCC.NET automatically updates values changed in the Edit Cargo dialog box (Length, Width, Height, Unit Weight, No of Units) in the corresponding fields present in the Cargo Details dialog box. The Measure and Weight of cargo are then calculated, based on the Cargo detail values entered.
- For a Non-Generic model, PCC.NET automatically updates the values (No of Units, Unit Weight) in the Edit Cargo dialog box in the corresponding fields (Units, Unit Weight) in the Cargo Details dialog box.
- For a Generic model, PCC.NET automatically updates values changed in the Edit Cargo dialog box (Length, Width, Height, Unit Weight, No of Units) in the corresponding fields present in the Cargo Details dialog box. The Measure and Weight of cargo are then calculated, based on the Cargo detail values entered.
-
-
Manual Adjustment of Cargo Details for Multiple Cargo Entries:
-
If there are multiple entries of Cargo in the Edit Cargo dialog box, and you change any of its details, PCC.NET does not auto adjust its corresponding values in the Cargo Details. You must manually update all values, in such a case.
-
-
-
-
When you create a Booking from Contract, all revenue charges for a particular Port pair and selected Make/Model are retrieved in the Booking from the latest revision of the Contract. A privileged Booking user is able to add Supplementary charges and update some existing revenue information in Booking. Only Freight Collection Office, Invoicing Office and Payer fields are editable in the Booking when a charge is retrieved from Contract and the charge basis does not fall among PT or RT. Other charges from Contract cannot be changed in Booking.
-
For the charges with basis as PT and having dependent charges against that PT basis charge saved in Contract, while creating a Booking, PCC.NET checks if at least one Applicable Charge is available in the Contract, calculates, and populates the amount in the Booking for a given port-pair combination.
-
For the changes with basis as RT, you can change the value of cargo UM to RT when you want to put Rated At value as per your desired value, otherwise Rated At value gets automatically calculated, hence is disabled.
-
-
For EDI Bookings, the Revenue Details panel initially appears blank. You need to select the Contract Number to retrieve the latest rates from the Contract for all the Makes and Models in the Booking.
-
In Booking, you can add only additional Supplementary charges, provided those are not present under the latest version of the Contract.
-
If you have deleted a Supplementary charge in the Booking that is present in the associated Contract and then try to add it again to the Booking, PCC.NET restricts to add that Supplementary charge. You must click REFRESH RATE FROM CONTRACT and add the required Supplementary charge.
-
To modify any rate of Contractual charge, you need to update the Contract first and apply the new rates using REFRESH RATE FROM CONTRACT. You may need to refresh the rate after re-selecting Contract number while switching between Broker and Broker customer.
-
While performing a Refresh Rate from Contract, when expired charge(s) are present against the ATD (if available)/ETD at the first Load Port for a particular Vessel/Voyage, PCC.NET automatically dis-associates the charge from the associated Booking Revenue. You are not required to remove the expired charge(s) additionally. When the ATD (if available)/ETD at the first Load Port is not between the Effective From and Effective To dates of the Contract, the Revenue charge(s) are considered as expired.
-
If any Load Port (LP)/Discharge Port (DP) pair of a Contract has been deleted, during Refresh Rate from Contract action, when Booking is not rolled over or first LP/last DP did not change, PCC.NET ignores the deletion of LP/DP pair and retrieves the new charges from the Contract that are missing in the Booking, the latest rates of the existing revenues in Booking, and FMC information, if present. But after Booking Rollover, PCC.NET restricts you to refresh the rate if the first LP or last DP of the Booking has changed and the current port pair of the Booking is already deleted from the associated Contract. In such a case, it displays an error message stating that the current port pair is not present in the Contract; you must add the port pair in the Contract.
-
If overlapping rates are populated from Contract, you should delete the duplicate charges with same charge codes.
-
PCC.NET verifies if the charge/rate is same as per Make and Model of the corresponding latest revision of the Contract. If there is any mismatch, it restricts you from saving the PCC Booking.
-
When you change the Payment Term (P/C) value or Freight Collection Office value in Booking, PCC.NET tries to find a unique Rate based on the Charge, Basis, Payment Term and Freight Collection Office, and automatically set it.
-
At least one revenue (OFR) must be there for each Make and Model in Booking.
-
You can add a charge multiple times with different rates for a cargo. Also, you may add a supplementary charge multiple times with different rates when you add it in Booking without associating it with any Make/Model.
-
If a Booking contains multiple OFR charges, they must all be in same currency values.
-
Rate can be zero for both Contractual and Supplementary changes, that is amount can be zero for any charges.
-
Booking Payer must be active in PCC.NET.
-
At the time of saving the Booking, PCC.NET checks the Contract charges in the Booking. If all Contract revenues (except, OFR) for one charge code against a Cargo are removed in the Booking Revenue, a warning message appears asking your confirmation whether you want to proceed without those revenues. On confirmation, PCC.NET proceeds to save the Booking, otherwise not.
-
During saving the Booking, PCC.NET also checks if the currency in the Booking Revenue has been deleted and if the date of currency becoming obsolete is later than the system date. If this validation fails at any Booking status, you cannot save the Booking.
-
-
Booking for space checking does not require Revenue information.
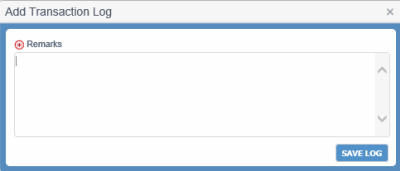
- Click SAVE to create the Booking request. The Add Transaction LogAdd Transaction Log dialog box opens where you can specify the changes done to the Booking allowing PCC.NET to save it in the Booking Log. You can view the log entry later by clicking BOOKING LOG in the Booking Header.
-
How PCC.NET checks for duplicate BookingsHow PCC.NET checks for duplicate Bookings
Duplicate Booking check is done during following status changes when a similar kind of Booking exists in Requested, Accepted, and Reconciled status:
-
Draft to Requested: When you complete entering all Booking information and try to change the Booking status by clicking SAVE.
-
Accepted to Requested: For example, when you change Cargo, Voyage or Route information in a Booking in Accepted status.
-
Requested to Requested: For example, when you change Booking data keeping its status unchanged to Requested.
It checks for duplicate Bookings based on following Booking parameters:
-
LP-DP
-
Make/Model
-
Units (along with Unit of Measurement)
-
All Customers (Initiator, Shipper, Forwarder and Consignee)
When PCC.NET finds duplicate Bookings, it displays a warning message with the option to proceed on your confirmation.
-
-
Points to remember while updating a BookingPoints to remember while updating a Booking
-
You can change the Booking anytime. If you update Voyage or Route information in a Booking having Accepted or Reconciled status, the Booking leg status and Booking status are impacted. Logic details Logic details.
For Line or PCL with voyage Transport Category:
-
If you update a Booking leg having voyage and PCC.NET finds that the previous and the updated voyages are managed by different Line Managers, the leg status becomes Not Approved from Approved, otherwise remains as Approved.
For Feeder or PCL without Voyage Transport Category:
-
If you change the Booking leg that does not have any voyage to a Line/PCL leg category that has voyage, the leg status becomes Not Approved.
-
If user changes the ATD/ETD and ATA/ETA values of the feeder without changing the route leg category, the leg status will remain unchanged (Approved). If this leg falls under auto-approved Feeder Service category, and the leg status was Arranged earlier, it remains Arranged.
In the above two scenarios, if the first leg (irrespective of Line/PCL/Feeder) of the route becomes Not Approved, PCC.NET also changes the Booking Status from Accepted to Requested. The change in Booking status happens only for Accepted Bookings and will not apply if the Booking is in Reconciled status.
E-mail notification is sent to Approvers on change of both Cargo and Route:
Updated Information
E-mail Recipient
Route
Approver of the particular Booking leg.
Cargo
All approvers of the Booking.
Cargo and/or Route
All approvers. The e-mail body will indicate what information (Cargo or Route) has been updated.
-
-
You can update Contract number only for Agreement with Brokers to Agreement with Broker Customer until the Booking becomes Requested. The updated Contract number should have the same Port pair and Make/Model combination that matches with the old Contract.
-
If you click REFRESH RATE FROM CONTRACT, PCC.NET changes Revenue based on Makes/Models that exist in the Booking with the rate in the latest revision of the Contract associated with those Makes/Models.
-
After Booking creation (even in Draft mode) if you make any changes in the Contract in the following fields, Booking is not refreshed:
-
Documentation Issuing Office in Contract Header pane
-
Freight Collection Ofc in Contract Revenue pane
-
Invoicing Ofc in Contract Revenue pane
-
Payer in Contract Revenue pane
-
Booking Remarks and Freight Remarks
-
-
You cannot update a Booking with a Cross Reference Customer if it has been created earlier with a non-Cross Reference Customer.
-
-
FMC information can be added to a Contract having Origin/Destination in US territory, but is not mandatory. If available, the information is populated in the corresponding Booking during:
-
Create Booking from Contract
-
Add Cargo from Contract
-
Add Revenue in Booking by Refresh Rate From Contract
While creating Booking from Contract, PCC.NET retrieves and default FMC-related information for the newly-added cargoes in the Booking as per the following logic. Once defaulted from Contract, Booking user can change the FMC Filing type and FMC Number in Booking. FMC information is eventually defaulted from Booking in B/L.
-
FMC information retrieved during creating a Booking from Contract
While creating a Booking, if FMC information is already entered in the corresponding Contract (having Origin/Destination in the US territory), that information gets automatically populated in the FMC Details dialog box of the corresponding Booking.
-
If the FMC information is entered at Port-pair level of a Contract, the information gets populated in the FMC References pane of the FMC Details dialog box.
-
If the FMC information is entered at Make Model level of a Contract, the Exempt FMC check box gets selected in the Cargo Details panel of the FMC Details dialog box.
-
If the FMC information is entered at Revenue level of a Contract, the information gets populated in the FMC Filing Against Revenue panel of the FMC Details dialog box.
Notes:
-
If the FMC information entered in a Contract is an expired one, while creating a Booking from the Contract, PCC.NET displays an warning message ("600036-CON-Contract contains expired FMC information. Do you want to proceed with expired FMC?") asking user whether to apply expired FMC information in the Booking. You need to confirm in the message to apply the FMC details in that Booking.
-
During Booking creation PCC.NET checks if Space Charter Agreement Number entered in the Contract is not deleted from the FMC Document Details (OPBKW07) screen. If that Space Charter Agreement Number is deleted from FMC Document Details (OPBKW07) screen, PCC.NET ignores the Space Charter Agreement Number and creates the Booking without any FMC information.
-
While updating the FMC information in a Booking, if the FMC information is already entered in the Revenue level, and you try to select the Exempt FMC check box, PCC.NET displays an warning message,"There are already FMC Filing information entered with associated revenue. Do you want to remove them?". You need to confirm the deletion in the message.
-
While updating the FMC information in a Booking, if you clear the Exempt FMC check box and add FMC information against only one Revenue, while saving, PCC.NET displays an error message "300062-BKG-Required FMC filing details for cargo seq.1 and Revenue seq. 2".
FMC information retrieved during Refresh Rate from Contract after Rollover
-
If Rollover does not change First LP or Last DP, there is no impact on FMC details retrieved during Refresh Rate from Contract.
-
After Rollover from a non-US port to an US port, FMC details are retrieved and selected from Contract by checking the availability of FMC details hierarchically (that is, first Booking level, then Cargo level, and lastly Revenue level in the FMC Details dialog box).
-
After Rollover from an US port to another US port, existing FMC details are deleted first and the new details retrieved from Contract are applied by checking the availability of FMC details hierarchically.
FMC information retrieved during Refresh Rate from Contract (without Rollover)
-
If the Contract has FMC information at the Revenue level, during the Refresh Rate from Contract process, the same is selected against that Booking Revenue.
-
If Booking has Space Charter Agreement number in the FMC Reference pane of the FMC Details dialog box, Contract-specific FMC information is ignored.
FMC information retrieved during adding Cargo from Contract
-
If the Contract has FMC information at the port-pair level, FMC information present for the newly-added cargos in the Contract does not get displayed in the Booking.
-
If the Contract has FMC information at the Cargo or Revenue level, FMC information gets retrieved in the Booking.
Notes:
- During Add Cargo from Booking, PCC.NET checks if Space Charter Agreement Number is available in the FMC Reference pane of the FMC Details dialog box. If any Space Charter Agreement Number is entered in the Booking, FMC information does not get retrieved in the Booking.
- During Add Cargo from Contract, PCC.NET checks if Space Charter Agreement Number entered in the Contract is active in the FMC Document Details (OPBKW07) screen. If that Space Charter Agreement Number is deleted from FMC Document Details (OPBKW07) screen, PCC.NET ignores Space Charter Agreement Number.
- If the FMC information is an expired one with respect to the ETD of the first load port, PCC.NET displays warning message.
-
-
2. Copy Booking (for Customer-Requested Booking only)
To create a Booking as a copy of an existing Booking, you must have the Create Booking role and the Create Booking From Contract system action.
You can use the Copy Booking function for a Customer-Requested Booking] only. The status of the corresponding Booking must be Requested, Accepted or Reconciled.
To copy an existing Booking:
- Click Operational > Booking > Booking Search to open the Search Booking (OPBKW01) screen.
- Enter the desired search criteria in Search Criteria panel to find out the Booking you want to copy. Click here to view the field descriptions.
- Click SEARCH. The Booking numbers matching the search criteria are listed in the Search Details panel.
- In the Search Details panel you can copy an existing Booking detail to create a new Booking in Draft status. This can be done in one of the following ways:
- Click the Copy Booking option from the Gear
 icon adjacent to any Booking number whose details you want to copy. You are navigated to the Create/Update Booking (OPBKW02) screen displaying all Booking information of the initial source Booking.
 - Click COPY BOOKING in the View Booking (OPBKW03) screen displayed on clicking a Booking number in the list of search results. You are navigated to the Create/Update Booking (OPBKW02) screen displaying all Booking information of the initial source Booking.
- Click the Copy Booking option from the Gear
Except VIN, all other Booking information of the initial source Booking No. is populated in the new Booking.
- In the Create/Update Booking (OPBKW02) screen, you can make the required modifications, and click SAVE. When you click this button, the Add Transaction LogAdd Transaction Log dialog box is displayed to specify the changes you made in the Booking, so that PCC.NET can save the log entry in the Booking log. You can view the log entry later by clicking BOOKING LOG in the Booking Header.

A new Booking number is generated, once the Booking details are saved.
-
How PCC.NET checks for duplicate BookingsHow PCC.NET checks for duplicate Bookings
Duplicate Booking check is done during following status changes when a similar kind of Booking exists in Requested, Accepted, and Reconciled status:
-
Draft to Requested: When you complete entering all Booking information and try to change the Booking status by clicking SAVE.
-
Accepted to Requested: For example, when you change Cargo, Voyage or Route information in a Booking in Accepted status.
-
Requested to Requested: For example, when you change Booking data keeping its status unchanged to Requested.
It checks for duplicate Bookings based on following Booking parameters:
-
LP-DP
-
Make/Model
-
Units (along with Unit of Measurement)
-
All Customers (Initiator, Shipper, Forwarder and Consignee)
When PCC.NET finds duplicate Bookings, it displays a warning message with the option to proceed on your confirmation.
-
-
Points to remember while updating a BookingPoints to remember while updating a Booking
-
You can change the Booking anytime. If you update Voyage or Route information in a Booking having Accepted or Reconciled status, the Booking leg status and Booking status are impacted. Logic details Logic details.
For Line or PCL with voyage Transport Category:
-
If you update a Booking leg having voyage and PCC.NET finds that the previous and the updated voyages are managed by different Line Managers, the leg status becomes Not Approved from Approved, otherwise remains as Approved.
For Feeder or PCL without Voyage Transport Category:
-
If you change the Booking leg that does not have any voyage to a Line/PCL leg category that has voyage, the leg status becomes Not Approved.
-
If user changes the ATD/ETD and ATA/ETA values of the feeder without changing the route leg category, the leg status will remain unchanged (Approved). If this leg falls under auto-approved Feeder Service category, and the leg status was Arranged earlier, it remains Arranged.
In the above two scenarios, if the first leg (irrespective of Line/PCL/Feeder) of the route becomes Not Approved, PCC.NET also changes the Booking Status from Accepted to Requested. The change in Booking status happens only for Accepted Bookings and will not apply if the Booking is in Reconciled status.
E-mail notification is sent to Approvers on change of both Cargo and Route:
Updated Information
E-mail Recipient
Route
Approver of the particular Booking leg.
Cargo
All approvers of the Booking.
Cargo and/or Route
All approvers. The e-mail body will indicate what information (Cargo or Route) has been updated.
-
-
You can update Contract number only for Agreement with Brokers to Agreement with Broker Customer until the Booking becomes Requested. The updated Contract number should have the same Port pair and Make/Model combination that matches with the old Contract.
-
If you click REFRESH RATE FROM CONTRACT, PCC.NET changes Revenue based on Makes/Models that exist in the Booking with the rate in the latest revision of the Contract associated with those Makes/Models.
-
After Booking creation (even in Draft mode) if you make any changes in the Contract in the following fields, Booking is not refreshed:
-
Documentation Issuing Office in Contract Header pane
-
Freight Collection Ofc in Contract Revenue pane
-
Invoicing Ofc in Contract Revenue pane
-
Payer in Contract Revenue pane
-
Booking Remarks and Freight Remarks
-
-
You cannot update a Booking with a Cross Reference Customer if it has been created earlier with a non-Cross Reference Customer.
-
-
FMC information can be added to a Contract having Origin/Destination in US territory, but is not mandatory. If available, the information is populated in the corresponding Booking during:
-
Create Booking from Contract
-
Add Cargo from Contract
-
Add Revenue in Booking by Refresh Rate From Contract
While creating Booking from Contract, PCC.NET retrieves and default FMC-related information for the newly-added cargoes in the Booking as per the following logic. Once defaulted from Contract, Booking user can change the FMC Filing type and FMC Number in Booking. FMC information is eventually defaulted from Booking in B/L.
-
FMC information retrieved during creating a Booking from Contract
While creating a Booking, if FMC information is already entered in the corresponding Contract (having Origin/Destination in the US territory), that information gets automatically populated in the FMC Details dialog box of the corresponding Booking.
-
If the FMC information is entered at Port-pair level of a Contract, the information gets populated in the FMC References pane of the FMC Details dialog box.
-
If the FMC information is entered at Make Model level of a Contract, the Exempt FMC check box gets selected in the Cargo Details panel of the FMC Details dialog box.
-
If the FMC information is entered at Revenue level of a Contract, the information gets populated in the FMC Filing Against Revenue panel of the FMC Details dialog box.
Notes:
-
If the FMC information entered in a Contract is an expired one, while creating a Booking from the Contract, PCC.NET displays an warning message ("600036-CON-Contract contains expired FMC information. Do you want to proceed with expired FMC?") asking user whether to apply expired FMC information in the Booking. You need to confirm in the message to apply the FMC details in that Booking.
-
During Booking creation PCC.NET checks if Space Charter Agreement Number entered in the Contract is not deleted from the FMC Document Details (OPBKW07) screen. If that Space Charter Agreement Number is deleted from FMC Document Details (OPBKW07) screen, PCC.NET ignores the Space Charter Agreement Number and creates the Booking without any FMC information.
-
While updating the FMC information in a Booking, if the FMC information is already entered in the Revenue level, and you try to select the Exempt FMC check box, PCC.NET displays an warning message,"There are already FMC Filing information entered with associated revenue. Do you want to remove them?". You need to confirm the deletion in the message.
-
While updating the FMC information in a Booking, if you clear the Exempt FMC check box and add FMC information against only one Revenue, while saving, PCC.NET displays an error message "300062-BKG-Required FMC filing details for cargo seq.1 and Revenue seq. 2".
FMC information retrieved during Refresh Rate from Contract after Rollover
-
If Rollover does not change First LP or Last DP, there is no impact on FMC details retrieved during Refresh Rate from Contract.
-
After Rollover from a non-US port to an US port, FMC details are retrieved and selected from Contract by checking the availability of FMC details hierarchically (that is, first Booking level, then Cargo level, and lastly Revenue level in the FMC Details dialog box).
-
After Rollover from an US port to another US port, existing FMC details are deleted first and the new details retrieved from Contract are applied by checking the availability of FMC details hierarchically.
FMC information retrieved during Refresh Rate from Contract (without Rollover)
-
If the Contract has FMC information at the Revenue level, during the Refresh Rate from Contract process, the same is selected against that Booking Revenue.
-
If Booking has Space Charter Agreement number in the FMC Reference pane of the FMC Details dialog box, Contract-specific FMC information is ignored.
FMC information retrieved during adding Cargo from Contract
-
If the Contract has FMC information at the port-pair level, FMC information present for the newly-added cargos in the Contract does not get displayed in the Booking.
-
If the Contract has FMC information at the Cargo or Revenue level, FMC information gets retrieved in the Booking.
Notes:
- During Add Cargo from Booking, PCC.NET checks if Space Charter Agreement Number is available in the FMC Reference pane of the FMC Details dialog box. If any Space Charter Agreement Number is entered in the Booking, FMC information does not get retrieved in the Booking.
- During Add Cargo from Contract, PCC.NET checks if Space Charter Agreement Number entered in the Contract is active in the FMC Document Details (OPBKW07) screen. If that Space Charter Agreement Number is deleted from FMC Document Details (OPBKW07) screen, PCC.NET ignores Space Charter Agreement Number.
- If the FMC information is an expired one with respect to the ETD of the first load port, PCC.NET displays warning message.
-
-
3. Update EDI/Web Booking Requests
The Booking user receives a Booking request through an e-mail notification. This e-mail contains the Booking Number that has been automatically created in PCC.NET with default indicative data in Draft status. You need to search this Booking, view the associated e-mails containing the shipment details attached with the Booking, update it with actual information, and eventually complete it. The user who receives the mail belongs to the Country of the Booking’s first Load Port. Assuming you (as the Booking user) have received this notification, you can proceed to search, view e-mails, update, and complete the Booking in PCC.NET as described below.Enter number of units (No of Unit) for each cargo and its UM in the Cargo panel of the dialog box
To create Booking requests from information sent though EDI/RoRo Website:
You must have Create Booking role and Update Booking system action to edit an EDI Booking.
- Click Operational > Booking > Booking Search to open the Search Booking (OPBKW01) screen.
- Search EDI Booking Requests with the Booking Status Draft and the Booking Source as EDI or Web Booking and other desired search criteria in Search Criteria panel. Click here to view the field descriptions.
- Click SEARCH. The Booking Requests with matching criteria are listed in the Search Details panel.
- Click the View Email option from the Gear icon corresponding to the Booking, to see the e-mail communications against the selected Booking.
- Click the Edit option from the Gear icon corresponding to the Booking that you want to modify. You are navigated to the Create/Update Booking (OPBKW02) screen displaying the Booking details in Draft stage. The Booking request may contain some default or dummy data. You must change this information to actual information before saving the Booking. The dummy data appears highlighted.
- The Booking requests are populated with some default (indicative) data in Customer, Route and Cargo panels, which you need to update with actual information before you save the Booking. All the default information is highlighted on the screen. Click here for more details.Click here for more details.
- For EDI bookings, You must update the dummy Booking office value (EDIOFC) loaded by default to a valid Booking office in order to save the Booking.
- Web Bookings have actual customer. But EDI Booking requests may have the default Customer Code. If so, select the proper Customer Code that matches with the Customer Name populated in the respective field.
- Select the Departure On or After date in the Route Details panel. The ETD of the First Loading Port (for Pre-Carriage Line or Line) should be between the Validity period of the Contract associated.
The EDI process may send the Place of Receipt (PR) and Place of Delivery (PD) descriptions instead of the corresponding codes as route information. So, when the EDI Booking is opened in Edit mode, you may see the PR and PD as text boxes. You must select the proper PR and PD and then select the route. After the Booking is saved successfully, the PR and PD appear as labels like in normal Bookings. And after changing the PR and PD, you need to change the route accordingly.
- Select the relevant Contract Number (Contract No.) to associate it with the Booking.
Notes:
- An Web/EDI Booking may or may not have a Contract Number. It may also contain a dummy Contract number. When you access this Booking in Edit mode, the Contract No. field becomes highlighted and editable. You can enter the Contract Number in this field. If you are not sure of the Contract Number associated with the EDI Booking, you can use the Search icon. Clicking it displays a list of valid Contract Numbers based on the cargo and active port pairs that match with the currently-selected Booking. This Contract Number can be re-selected in the EDI Booking till an active and complete Bill of Lading is created against this Booking.
- You cannot associate a Booking with a Contract if the port-pair has been deleted in it.
- Click ADD CARGO FROM CONTRACT to match and add the cargo from Contract. The Cargo Details panel displays all the Makes and Models from the Booking Request, which may be Generic. You can change the Generic cargoes to Actual cargoes. Finally, you need to delete the unmatched/default cargo from the Booking manually.
-
Once you add cargo, corresponding revenue for each Make and Model gets added in the Revenue Details panel from the corresponding Contract. You can add Supplementary charges. The Revenue can be updated in this panel if Cargo and Revenue information is updated afterwards in the Contract. The panel appears blank initially.
-
Click ADD LEG to select the Booking leg information of the Route.
-
For LINE or PCL leg, enter the Voyage name for the leg using the Connecting Voyage dialog box. The leg you add must be approved by the respective Approver (Voyage Controller or Area Manager) ultimately for the Booking to get accepted.
-
Enter the Booking Office in the General Details panel. Documentation Entry Office and Documentation Issuing Office are also required during Booking acceptance.
- After you complete the data entry in the screen and click SAVE to save the changes. The Booking gets saved in Requested status. You need to follow the same process like you create a manual Booking from Contract. When you click this button, Add Transaction LogAdd Transaction Log dialog box opens for you to specify the changes you made in the Booking, so that PCC.NET can save the log entry in the Booking log. You can view the log entry later by clicking the BOOKING LOG in the Booking Header.
If an Web/EDI Booking is in Accepted status and the associated Contract Number is changed for that Booking, the status of that Booking changes to Requested once again.
Notes:
- More about the Booking Requests through EDI - Process Initiation
- Mandatory information required to save a Booking and change its statuses
- Conditions for accepting a Booking
-
How PCC.NET checks for duplicate BookingsHow PCC.NET checks for duplicate Bookings
Duplicate Booking check is done during following status changes when a similar kind of Booking exists in Requested, Accepted, and Reconciled status:
-
Draft to Requested: When you complete entering all Booking information and try to change the Booking status by clicking SAVE.
-
Accepted to Requested: For example, when you change Cargo, Voyage or Route information in a Booking in Accepted status.
-
Requested to Requested: For example, when you change Booking data keeping its status unchanged to Requested.
It checks for duplicate Bookings based on following Booking parameters:
-
LP-DP
-
Make/Model
-
Units (along with Unit of Measurement)
-
All Customers (Initiator, Shipper, Forwarder and Consignee)
When PCC.NET finds duplicate Bookings, it displays a warning message with the option to proceed on your confirmation.
-
-
Points to remember while updating a BookingPoints to remember while updating a Booking
-
You can change the Booking anytime. If you update Voyage or Route information in a Booking having Accepted or Reconciled status, the Booking leg status and Booking status are impacted. Logic details Logic details.
For Line or PCL with voyage Transport Category:
-
If you update a Booking leg having voyage and PCC.NET finds that the previous and the updated voyages are managed by different Line Managers, the leg status becomes Not Approved from Approved, otherwise remains as Approved.
For Feeder or PCL without Voyage Transport Category:
-
If you change the Booking leg that does not have any voyage to a Line/PCL leg category that has voyage, the leg status becomes Not Approved.
-
If user changes the ATD/ETD and ATA/ETA values of the feeder without changing the route leg category, the leg status will remain unchanged (Approved). If this leg falls under auto-approved Feeder Service category, and the leg status was Arranged earlier, it remains Arranged.
In the above two scenarios, if the first leg (irrespective of Line/PCL/Feeder) of the route becomes Not Approved, PCC.NET also changes the Booking Status from Accepted to Requested. The change in Booking status happens only for Accepted Bookings and will not apply if the Booking is in Reconciled status.
E-mail notification is sent to Approvers on change of both Cargo and Route:
Updated Information
E-mail Recipient
Route
Approver of the particular Booking leg.
Cargo
All approvers of the Booking.
Cargo and/or Route
All approvers. The e-mail body will indicate what information (Cargo or Route) has been updated.
-
-
You can update Contract number only for Agreement with Brokers to Agreement with Broker Customer until the Booking becomes Requested. The updated Contract number should have the same Port pair and Make/Model combination that matches with the old Contract.
-
If you click REFRESH RATE FROM CONTRACT, PCC.NET changes Revenue based on Makes/Models that exist in the Booking with the rate in the latest revision of the Contract associated with those Makes/Models.
-
After Booking creation (even in Draft mode) if you make any changes in the Contract in the following fields, Booking is not refreshed:
-
Documentation Issuing Office in Contract Header pane
-
Freight Collection Ofc in Contract Revenue pane
-
Invoicing Ofc in Contract Revenue pane
-
Payer in Contract Revenue pane
-
Booking Remarks and Freight Remarks
-
-
You cannot update a Booking with a Cross Reference Customer if it has been created earlier with a non-Cross Reference Customer.
-
-
Validations to know before you create the Booking:
-
-
By default, Main Customer of Contract is populated as Shipper. You can also add additional Customer details to Booking.
-
At least, one of the Booking customers (Initiator/Shipper/Forwarder) should be either the Main Customer or the Affiliated Customer in the associated Contract. However, this is not valid when you create a Booking from a Spot Rate Guideline Contract; you can select any customer (even dummy) as the Booking customer using the Auto-complete feature. If the Booking is being created from SRG Contract ‘Dummy Customer’ information is displayed as Shipper, which needs to be changed in the Booking.
-
Cross Reference Customer is not allowed during new Booking creation. If the Booking is already created with any Customer and later on that Customer is marked as Cross Reference, PCC.NET allows to save that Booking as it is already saved with that Customer. You cannot even update a Booking with a Cross Reference Customer if it has been earlier created with a non-Cross Reference Customer.
-
You can select any of Shipper, Forwarder, or Consignee as Initiator by selecting the respective check box.
-
PCC.NET does not accept a Booking with dummy Customer. Booking created from Spot Rate Guideline may have a dummy Customer. Booking can be in Draft or Requested status with Dummy Customer. But a valid customer is needed for a Booking to be Accepted.
-
At least, Initiator or Shipper is required to save a Booking as Requested or Accepted.
-
After you select a Customer, PCC.NET populates the remaining information from the Customer (RFCSW01) screen, which you can modify in the Booking.
-
Customer must be a valid customer (not deleted and not having cross reference number assigned against it) registered in Customer (RFCSW01) screen in PCC.NET.
-
In Initiator, Shipper, Forwarder, and Consignee tabs, you can select any Customer either from the list of values of Customer, or the Booking Customer dialog box which is displayed by clicking
with the list of all affiliated customers. When you change the Initiator, Shipper, Forwarder, or Consignee from the Name LOV, a Warning pop-up appears to confirm the action. -
For EDI Bookings, while editing the Customer information, Dummy Customer (9999997) is shown for Initiator, Shipper, Consignee, Forwarder, and Payer. For Non-SRG Contracts, Dummy Customer (9999999) is populated from the corresponding Contract but it cannot be saved.
-
-
-
Adding a route leg is optional in Draft Status.
-
Before creating the route, you need to select the Departure On/After date. Later on, this date is used for selecting the ATD (when available) or ETD of the first Booking route. For the Leg beyond the second line, schedules with ATD or ETD later than the ATA or ETA of the Discharging Port of the last Leg needs to be derived.
-
You can create route from three different types of transport Category in PCC.NET: Line, Feeder and PCL. Based on the Category you select, the fields in this panel varies. Click here to know about the common restrictions and validations of the different transport categories.
-
Each route must have at least one Line leg.
-
For PCL and Feeder legs, you can add cost information optionally.
-
You can add legs only at the end of the Route (after the last leg).
-
Load and Discharge port should be valid locations.
-
ATA/ETA value for the Arrives on Port should be later than the ATD/ETD of the Departs On port.
-
Load and Discharge ports should not be deleted with respect to the selected voyage.
-
-
In case, the From Location (LP) selected in the route is deleted for a Voyage, the Loading Port Name, C/O and ATD/ETD will appear in red font and as strike-through. Similarly, if To Location (DP) present in the route is deleted for a Voyage, PCC.NET displays Discharging Port Name, C/O and ATA/ETA in red font and strike-through.
-
During saving the Booking, if a port present in the Booking route is deleted for a Voyage, PCC.NET displays an error message asking you to change the Route.
-
To create Booking and update Booking, after a port has got Doc Locked for a Voyage, you need Privileged Booking User Role and Booking Creation for Supplementary B/L system action.
-
When the Booking legs are approved (and arranged for Feeder leg) and all mandatory information is entered, the Booking Status automatically changes to Accepted.
-
To let you easily distinguish Booking leg’s estimated date/time from the actual date/time, the ETD/ETA and ATD/ATA values are shown in different colors. ATD and ATA is shown in blue, whereas ETD and ETA in black.
Validations for LINE:
-
Route can be created with both intended and firmed voyages.
-
Each route must have at least one Line leg.
-
You cannot keep Voyage name blank. It must be either an intended or a firmed voyage.
-
Only voyages with data entry status Complete are used for Booking route creation.
-
While searching the connecting vessels, PCC.NET considers and display the ATA or ATD first if it is present, else, shows ETA or ETD.
-
If you add a transshipment leg, PCC.NET automatically selects the Transshipment check box in the Booking Header section.
Validations for PCL:
-
PCL can be the first leg.
-
PCL leg can be present after a feeder leg (Burge/Truck) or before LINE leg.
-
If voyage schedule is available beforehand, you can enter voyage for PCL otherwise you can leave Voyage blank. You can only enter the DP, approximate ETD/ETA and select Category as PCL.
-
While searching the connecting vessels, PCC.NET considers and display the ATA or ATD first if it is present, else, shows ETA or ETD.
Validations for Feeder:
-
Feeder can be the first leg or after any other leg (PCL or LINE). In addition, Feeder leg can be between LINES.
-
Multiple feeder service based on multiple service providers for same LP-DP can exist. Priority setting in Feeder Service (OPBKW09) is mandatory. During Booking creation, PCC.NET selects the feeder service with higher priority.
-
-
-
When you create a Booking from Contract, PCC.NET automatically populates the cargo details from it in this panel. For non-Generic Models, you can edit these cargo details by clicking
except the Cargo Type, Make and Model and some conditional fields. But, for Generic Models, PCC.NET allows to update all details in cargo (except Seq.) for all types of Contract. But Rate in the Revenue should be kept same as the initial rate for the Generic Model based on following logiclogic.-
If the newly-selected Model does not exist in the same Contract number -> LP/DP, PCC.NET does not change the Rate for that the Generic Model.
-
If the newly-selected Model exists in the same Contract number -> LP/DP, Rate automatically gets changed from the Generic Model rate to rate as per the newly-selected model.
-
-
You must add the Units (of PCC cargo) and UM to save the Booking.
-
For each cargo, at least one default L-W-H pattern cargo details is automatically retrieved from the corresponding cargo of Model Code (not Model Description), Length, Width, Height, Unit Weight, No. of Units, Total Weight and Total Measure (CBM). You can add or modify the L-W-H pattern Cargo details entry against each cargo. PCC.NET checks if at least one L-W-H pattern cargo details entry against each Make/Model irrespective of it’s type (Actual/Generic) is present.
-
You can delete any cargo but at least one cargo item must be present. On deletion of a cargo, corresponding L-W-H pattern all cargo detail entries also get deleted automatically.
-
The sum of Units of all Models present in Cargo Details dialog box must equal the No of Units entered in the Edit Cargo dialog box.
-
If Cargo Units are updated in Booking, the Booking status remains unchanged irrespective of its status.
-
The HS Code, Length, Width, Height, Bump to Bump, Mirr to Mirr, UM, and Cargo Hand fields are Auto-populated from the Model Master (RFMKW02) screen based on the corresponding Model code.
-
You can associate different VINs (Vehicle Identification Number) with the current Booking, provided those are not already associated with any other live Booking/shipment. If VINs are added to multiple B/Ls created from a Single Booking, then those VINs are also added to the associated Booking automatically. If any VIN is deleted from B/L, the particular VIN associated with the corresponding Booking also gets deleted automatically.
-
You can add cargo to the Booking from the associated Contract using ADD CARGO FROM CONTRACT, which fetches the cargo from the Contract. By default, already added cargo in the current Booking is shown auto-selected in the Cargo From Contract dialog box, which you cannot deselect. But you can add cargoes to Booking that are present in the corresponding Contract under the current Port pair.
-
While adding new cargo from Contract, it is mandatory to enter the No of Units along with its UM against each cargo to be newly added to the Booking.
-
If any Load Port (LP)/Discharge Port (DP) pair of a Contract has been deleted, during Add Cargo from Contract action, PCC.NET retrieves the Cargoes not present in the Booking, including FMC information (if present), ignoring the deletion of the associated LP/DP pair.
-
In case ETD of the first Load Port is available in the Booking and any of the FMC in Contract Revenue is expired with respect to the ETD of the first Load Port, a warning message “FMC document in contract is expired. Do you want to bring FMC information from Contract to Booking?”, on your acceptance the cargo is added from the Contract and those expired FMCs are set in Booking Revenue. Otherwise the cargo gets added without setting those FMCs in Booking Revenue.
-
Auto-adjustment of Cargo Details for Single Cargo Entry:
-
If you change the Model name in the Edit Cargo dialog box and there is a single entry against a Cargo in the Cargo Details dialog box, PCC.NET auto updates the respective Model Description, Length, Width, Height, Unit Weight and Unit values in the Cargo Details dialog box. Measure and Weight of the cargo details are then calculated based on the updated cargo details entered. However, if there are multiple cargo entries, you have to manually modify the details in the respective panels of the Cargo Details dialog box, as well.
-
If you update any cargo attribute other than the Model name in the Edit Cargo dialog box and there is a single entry against the Cargo details, its Model Description remains unchanged in the Cargo Details dialog box. However:
- For a Generic model, PCC.NET automatically updates values changed in the Edit Cargo dialog box (Length, Width, Height, Unit Weight, No of Units) in the corresponding fields present in the Cargo Details dialog box. The Measure and Weight of cargo are then calculated, based on the Cargo detail values entered.
- For a Non-Generic model, PCC.NET automatically updates the values (No of Units, Unit Weight) in the Edit Cargo dialog box in the corresponding fields (Units, Unit Weight) in the Cargo Details dialog box.
- For a Generic model, PCC.NET automatically updates values changed in the Edit Cargo dialog box (Length, Width, Height, Unit Weight, No of Units) in the corresponding fields present in the Cargo Details dialog box. The Measure and Weight of cargo are then calculated, based on the Cargo detail values entered.
-
-
Manual Adjustment of Cargo Details for Multiple Cargo Entries:
-
If there are multiple entries of Cargo in the Edit Cargo dialog box, and you change any of its details, PCC.NET does not auto adjust its corresponding values in the Cargo Details. You must manually update all values, in such a case.
-
-
- RevenueRevenue
-
When you create a Booking from Contract, all revenue charges for a particular Port pair and selected Make/Model are retrieved in the Booking from the latest revision of the Contract. A privileged Booking user is able to add Supplementary charges and update some existing revenue information in Booking. Only Freight Collection Office, Invoicing Office and Payer fields are editable in the Booking when a charge is retrieved from Contract and the charge basis does not fall among PT or RT. Other charges from Contract cannot be changed in Booking.
-
For the charges with basis as PT and having dependent charges against that PT basis charge saved in Contract, while creating a Booking, PCC.NET checks if at least one Applicable Charge is available in the Contract, calculates, and populates the amount in the Booking for a given port-pair combination.
-
For the changes with basis as RT, you can change the value of cargo UM to RT when you want to put Rated At value as per your desired value, otherwise Rated At value gets automatically calculated, hence is disabled.
-
-
For EDI Bookings, the Revenue Details panel initially appears blank. You need to select the Contract Number to retrieve the latest rates from the Contract for all the Makes and Models in the Booking.
-
In Booking, you can add only additional Supplementary charges, provided those are not present under the latest version of the Contract.
-
If you have deleted a Supplementary charge in the Booking that is present in the associated Contract and then try to add it again to the Booking, PCC.NET restricts to add that Supplementary charge. You must click REFRESH RATE FROM CONTRACT and add the required Supplementary charge.
-
To modify any rate of Contractual charge, you need to update the Contract first and apply the new rates using REFRESH RATE FROM CONTRACT. You may need to refresh the rate after re-selecting Contract number while switching between Broker and Broker customer.
-
While performing a Refresh Rate from Contract, when expired charge(s) are present against the ATD (if available)/ETD at the first Load Port for a particular Vessel/Voyage, PCC.NET automatically dis-associates the charge from the associated Booking Revenue. You are not required to remove the expired charge(s) additionally. When the ATD (if available)/ETD at the first Load Port is not between the Effective From and Effective To dates of the Contract, the Revenue charge(s) are considered as expired.
-
If any Load Port (LP)/Discharge Port (DP) pair of a Contract has been deleted, during Refresh Rate from Contract action, when Booking is not rolled over or first LP/last DP did not change, PCC.NET ignores the deletion of LP/DP pair and retrieves the new charges from the Contract that are missing in the Booking, the latest rates of the existing revenues in Booking, and FMC information, if present. But after Booking Rollover, PCC.NET restricts you to refresh the rate if the first LP or last DP of the Booking has changed and the current port pair of the Booking is already deleted from the associated Contract. In such a case, it displays an error message stating that the current port pair is not present in the Contract; you must add the port pair in the Contract.
-
If overlapping rates are populated from Contract, you should delete the duplicate charges with same charge codes.
-
PCC.NET verifies if the charge/rate is same as per Make and Model of the corresponding latest revision of the Contract. If there is any mismatch, it restricts you from saving the PCC Booking.
-
When you change the Payment Term (P/C) value or Freight Collection Office value in Booking, PCC.NET tries to find a unique Rate based on the Charge, Basis, Payment Term and Freight Collection Office, and automatically set it.
-
At least one revenue (OFR) must be there for each Make and Model in Booking.
-
You can add a charge multiple times with different rates for a cargo. Also, you may add a supplementary charge multiple times with different rates when you add it in Booking without associating it with any Make/Model.
-
If a Booking contains multiple OFR charges, they must all be in same currency values.
-
Rate can be zero for both Contractual and Supplementary changes, that is amount can be zero for any charges.
-
Booking Payer must be active in PCC.NET.
-
At the time of saving the Booking, PCC.NET checks the Contract charges in the Booking. If all Contract revenues (except, OFR) for one charge code against a Cargo are removed in the Booking Revenue, a warning message appears asking your confirmation whether you want to proceed without those revenues. On confirmation, PCC.NET proceeds to save the Booking, otherwise not.
-
During saving the Booking, PCC.NET also checks if the currency in the Booking Revenue has been deleted and if the date of currency becoming obsolete is later than the system date. If this validation fails at any Booking status, you cannot save the Booking.
-
-
|
Related Topics |